========================================================================================================
things needed for this tutorial
-insolence
-entity
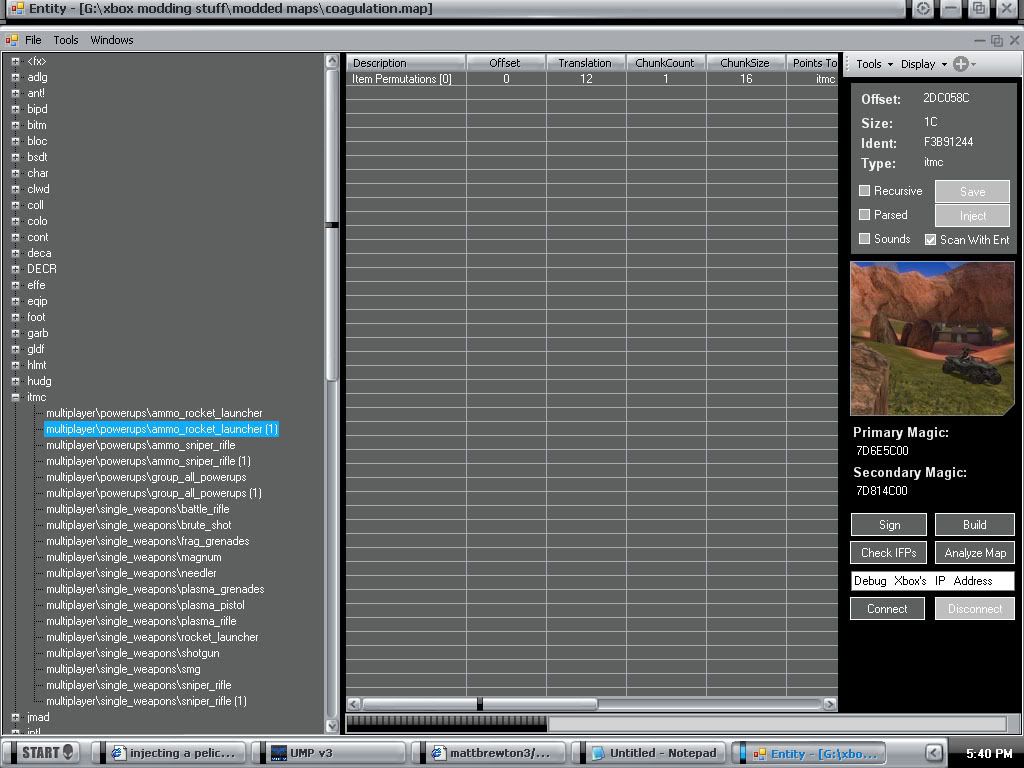
first thing i will start with is spawning a new itmc so that u can have all ur vehicles plus the pelican
-------------------------------------------------------------------------------------------------------
-entity
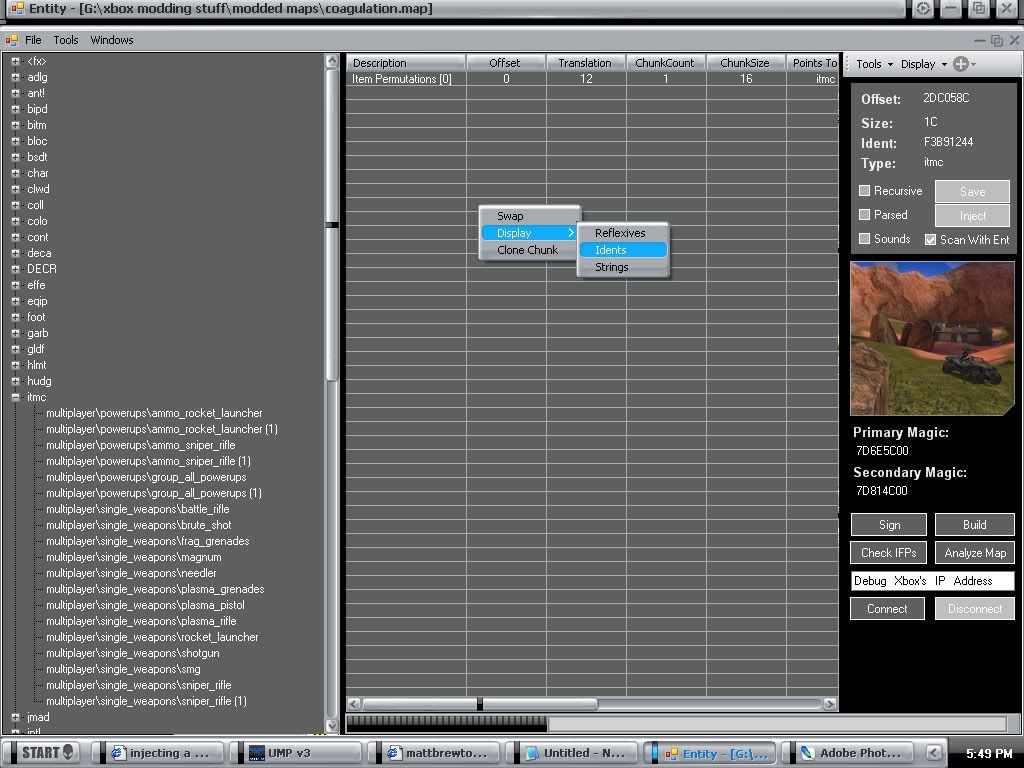
step 1)ok so you open your map and go down to itmc in the itmc tag click on one thing like multyplayer\powerups\ammo_rocket_launcher then right click and press duplicate
then it make a copy of it.

step 2)next u open up the itmc that you just made and in entity in the box on the right that says item permutation right click then go down to display then idents.
then it says item[o] right click that then click swap.Swap it to a vehicle like the wraith or something.
step 3)scroll down to the scnr tag and click it.then in the box on the right, right click and press clone chunk.In the clone chunk box scroll down to netgame equipment
and pick something like the rocket click it then on the right where it says amount of chuncks=20 change 20 to how ever many things u want and press clone then press add meta to map
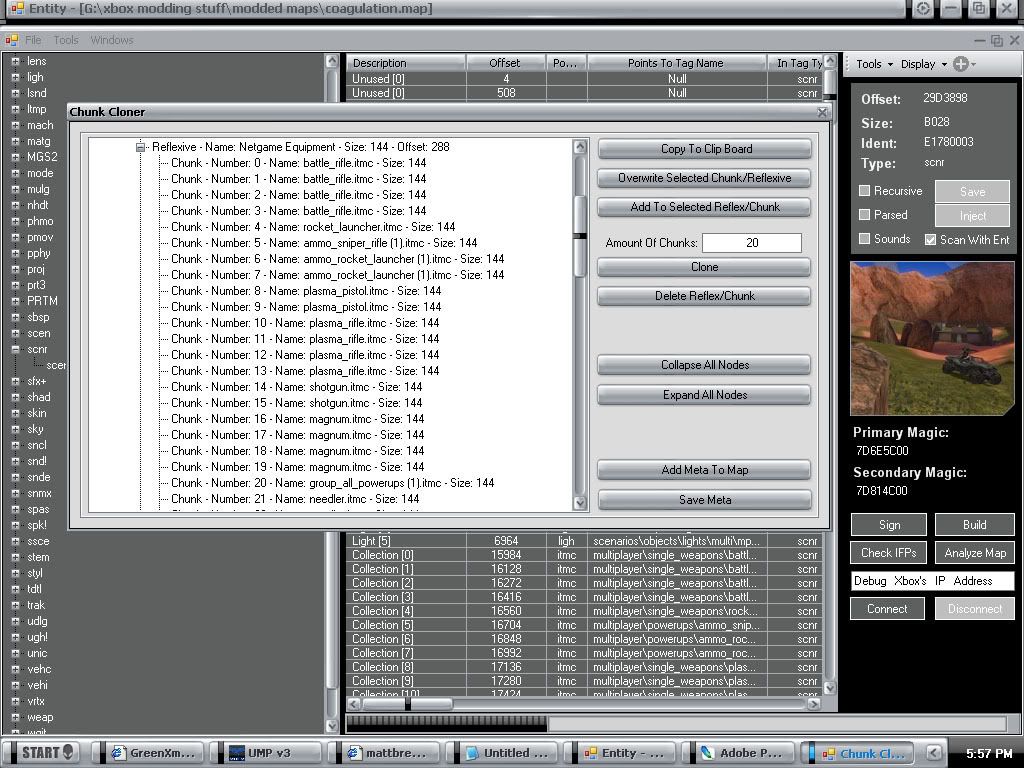
step 4)go back to scnr and in the right hand box right click and go to display idents.then if u cloned the rocket go down to itmc's(still under scnr) and find the rocket like
multiplayer\powerups\ammo_rocket_launcher and change that to the itmc u made earlyer(if u made 5 rocket launcher clones then u swap 5 and there should be 1 rocket left alone)
CONRATS U JUST SPAWNED A NEW ITMC THAT SPAWNS SOMETHING LIKE A WRAITH
(NOTE WILL HAVE TO BE MOVED LATER IN THE ENTITY BSP VIEWER AND AFTER IT IS MOVED IN BSP VIEWER THEN U HAVE TO CHANGE THE ITMC TO A PELICAN
BECAUSE THE PELICAN DOESNT SHOW IN THE BSP VIEWER)
____________________________________________________________________________________________________________________________________________________________________
Next is making a mach for the pelican to spawn on if your map doesnt have one or its not big enough
-ENTITY
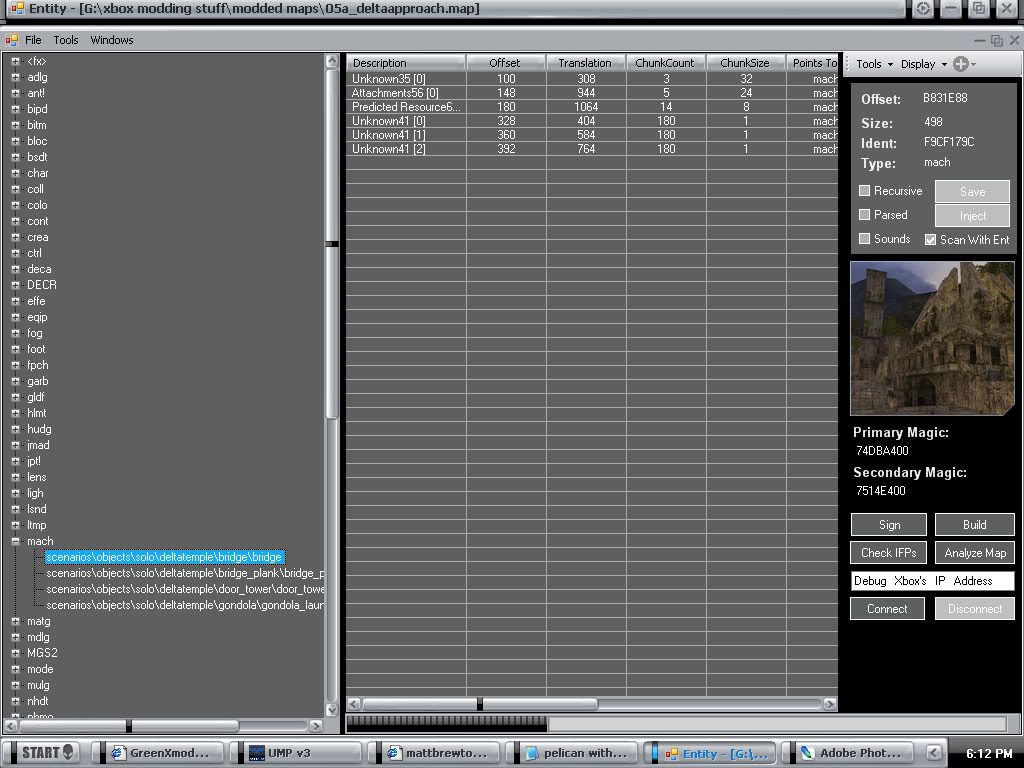
ok i am using coag and delta approach
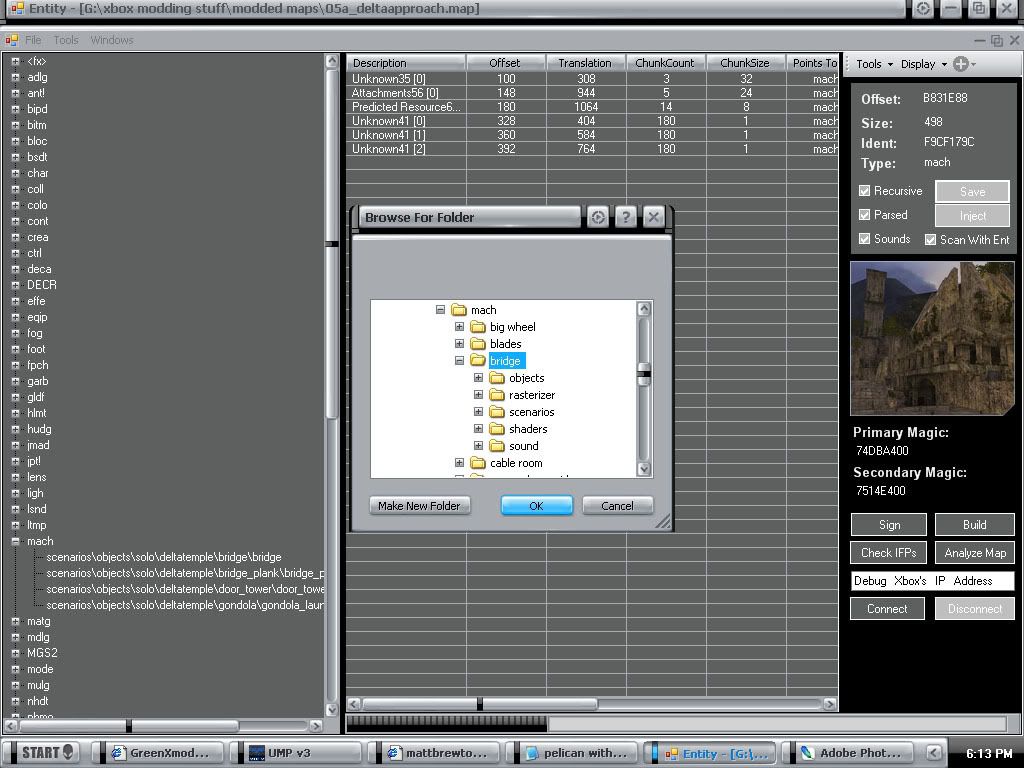
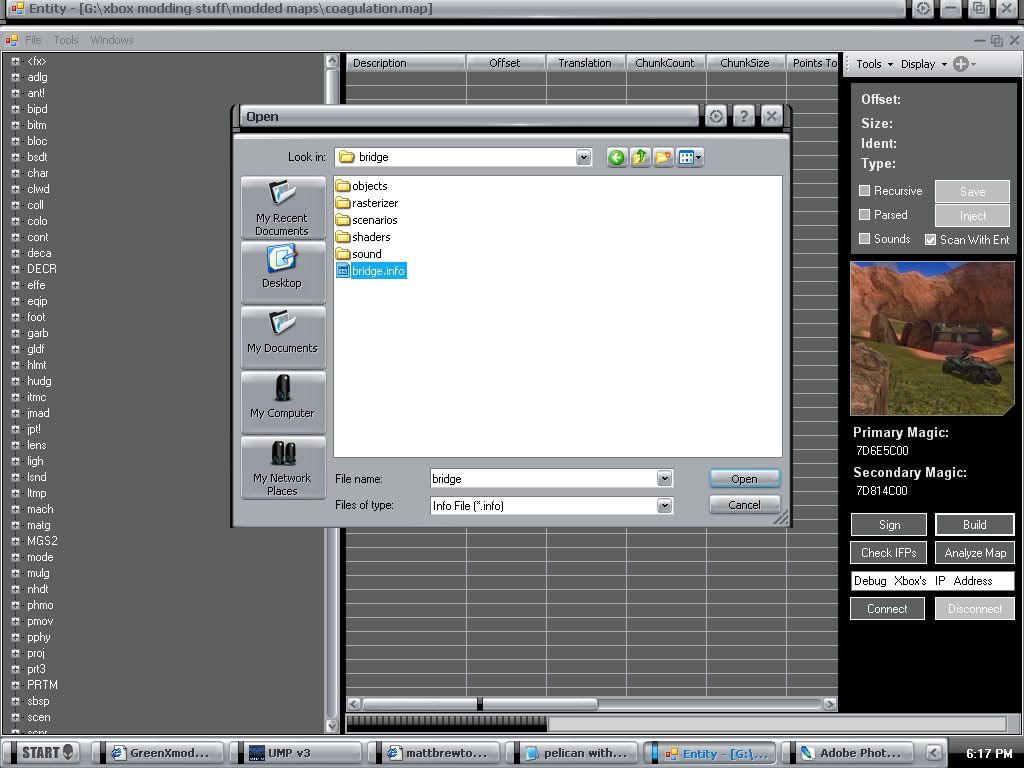
step 1)open delta approach and go down to mach and find scenarios\objects\solo\deltatemple\bridge\bridge click it then on the right side of entity where it says recursive parsed and
sounds press all three of those and press save(i saved mine as mach\bridge)save it then close that map.then open map and press build in the bottom right corner of entity
it brings a screen up find the folder that u saved the bridge to and go into that folder and finde the bridge.info and press open
step 2)make another itmc and swap the itmc to scenarios\objects\solo\deltatemple\bridge\bridge
CONRATS U JUST SPAWNED A NEW ITMC THAT SPAWNS SOMETHING LIKE A WRAITH
(NOTE WILL HAVE TO BE MOVED LATER IN THE ENTITY BSP VIEWER)
____________________________________________________________________________________________________________________________________________________________________
injecting the pelican
-INSOLENCE
Step-1 Open Maps
First, open Insolence. Now, open the multiplayer map in which you would like to play with the driveable pelican. Also open 05a_deltaapproach.map.
Step-2 Drag and Drop
To add the vehicle you must drag over the vehicle pelican. It will drag over the other pelican vehicles for you. Navigate your way to the pelican under the vehi tag. Drag and drop
it from 05a_deltaapproach.map to your map that you want the pelican in.
Step-3 MoveBox
Each time you drag & drop a tag, a small status box will pop up to give you information about what the program is doing while you wait. The longest part is usually "Relinking" and
it may seem like it froze.. It didn't, it just has to do a lot of file reading & writing at this point, so let it be. When the move is done, the box will go away.
Step-4 Close unneeded maps
Close 05a_deltaapproach.map
Step-5 Fix Seats
Since this vehicle was made for campaign you are going to need to change many string indincies. Select the pelican vehicle and double click it. Then underneath the change plugins there
should be the following text "IFP Plugin-"Vehi"Edit mode". Click it and it will change and say "IFP Plugin-"Vehi"Dev mode". From there go to Unknown 11 under Reflexives. Underneath the
words "Author: Iron_Forge" There is a drop down bar with and arrow on the right side with a bunch of numbers. We will only need to edit 0-11. Under the 0 change the first string ID to
"warthog_d". Then you are done. Go to 1, and change the first string ID to "spectre_p_r". Do the same for 2-10. For number 11 change the first string ID to "warthog_g".
Step-6 Adding the pelican
First go to 'map options' in the upper left corner and go to 'sort by path'. Then click multiplayer, and select "multiplayermultiplayer_globals.mulg". Double click it.
Got to Dev mode and choose unkown 2. Choose uknown 2 under that, and choose number 2 in the upper left drop down box. Double click the ID and change it to pelican, you can do the same for number 3, then there are no more tanks, only pelicans.
Step-7 Fix encryption
Go to 'map options' in the upper left, and click 'fix map signature' and wait 10-20 seconds, usually less. Then ftp it over to your xbox and enjoy.
__________________________________________________________________________________________________________________________________________________________________
im not going to go into how to move the things you just created with the bsp viewer
WHOLE TUT WRITTEN BY MATT BREWTON EXCEPT FOR THE PELICAN INJECTION PART
CREDIT GOES TO ME MATT BREWTON AND FLAVE FOR HELPING ME GET TO WHERE I AM AT IN MODDING TODAY AND WHO EVER WROTE HOW TO INJECT THE PELICAN