How to make a Planet

Finish a new model/mesh? Got something you're working on? Finish a new map? Here's the place to post it for feedback and whatnot.
Post Reply
xray15


Posts: 26
Joined: Fri Apr 01, 2005 6:51 pm

How to make a Planet

Post by xray15 »

In this tutorial, I will explain how to make planets. Get comfortable, and put on some of your favorite music.

Image

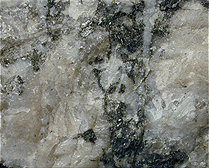
Ok first get a nice texture. I used this texture, I got off of google. Open the texture up, and expand the canvas to 4000x4000. (Image>Canvas>Size) Use the clone tool, and star to fill up the canvas. When thats finished go to Edit>Define Pattern, and hit ok. Now close the texture.

Image

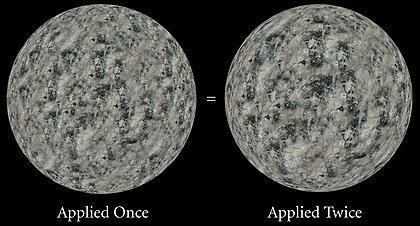
Make a new document 4000x4000, and fill the background black. Make a new layer, and grab the circular marquee tool, and make a perfect circle (hold shift). Now Fill it with your texture, and shperize it (Filter>Distort>Spherize) Put the amount to 100. Once its applied, do it 1 more time. Do not close the document!.

Image

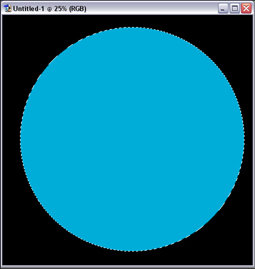
Now that you have your planet texture, lets start making the atmosphere and shade! Make a new document, 2000x2000 (always make it it half of you planet) Fill the background black, and make a new layer. Grab the circular Marquee tool , and make another perfect circle. Fill it with a nice blue, I used 59A4D4. Make 2 copies of the layer, and make the black.

ImageImage

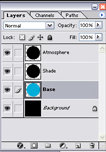
Select the Atmosphere layer. Set the layer to screen and go to Inner Shadow, and apply these settings
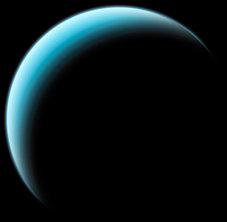
You should get something like this. Now move on to the shade layer, make sure its deselected (the dotted line shouldnt be around it). Go to Filter>Blur>Gaussian Blur. Set the amount to 50. Make sure the shade layer is above the atmosphere layer. You should get something like this

Image

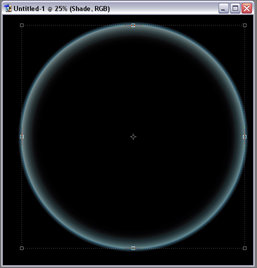
Now resize the shade, by hitting Ctrl+T. Adjust it until you like it, or until you get something like this.

Image

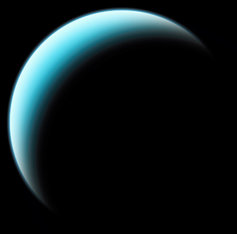
Since the shade, is bigger than the planet, it goes past the planet. So in a start field, you would see this black circular thing, Ctrl+click on the base layer, so you get that line around the circle. Now click on the shade layer, and hit Ctrl+c, and then Ctrl+v

Image

Now you should see the atmoshpere showing through the back. To fix this, make a new layer, and link the atmosphere layer to it, and merge them together Ctrl+E. Then take a soft eraser, opacity about 70-80, and start erasing.

Image

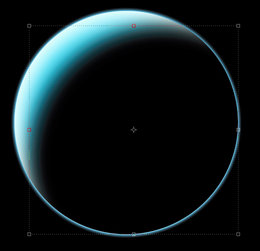
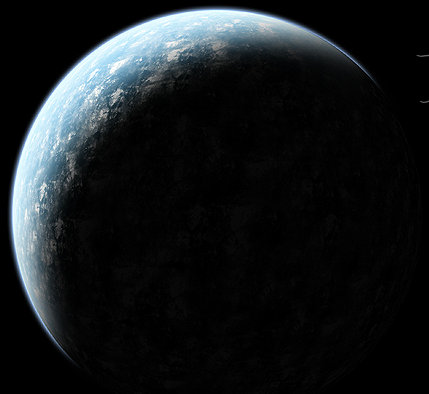
Now that the Planet is basically put together, we need to texturize this baby. Copy your planet into the document with the atmosphere and shades. Your planet should be twice the size of your atmosphere and shade. Resize it so it fits in. When your done resizing, move the planet layer in between the Base and atmosphere layer.

Now heres the fun part, experiment with changing blend modes. I duplicated mine 5 times. If you want to experiment on your own you can. Here are my blending modes. First layer-Normal; Second and Third layer-Multiply; Fourth layer-Color Dodge; Fifth layer-Saturation. Now go experiment, duplicate the layers, change stuff. The possibilities are endless. Find more textures on google. Now have fun. I hope this tutorial Helps people.

Image

This will be good for haloCE.
Last edited by xray15 on Wed Apr 27, 2005 3:16 pm, edited 1 time in total.
cooldude5990


Posts: 540
Joined: Tue Jan 20, 2004 12:03 pm

Post by cooldude5990 »

thats pretty cool.
Image
Patrickssj6


Pi Collaborator

Posts: 5426
Joined: Sat Jul 24, 2004 12:12 pm
Location: I'm a Paranoid
Contact:

Post by Patrickssj6 »

awesome thanks!
...left for good
Sonictag


Wordewatician 500

Posts: 1241
Joined: Sun Aug 15, 2004 11:01 am
Location: England

Post by Sonictag »

Nice tutorial dude, thats a pretty cool effect.
User avatar
SnaFuBAR


Posts: 2515
Joined: Sun Apr 04, 2004 11:21 pm

Post by SnaFuBAR »

looks like the covies glassed that one. nice tutorial man!
Image
Dude. No. Do you even know who Katarn and Snaf are?They are some of the few 1337est modelers that have ever set foot in CE. =D
BoxBoy


Wordewatician 50

Posts: 81
Joined: Wed Dec 22, 2004 5:06 pm

Post by BoxBoy »

thats awesome, ill have to try this out.
samuraisams123


Posts: 11
Joined: Sat Apr 02, 2005 1:11 pm
Location: in the Seven Seas of Rhye
Contact:

Post by samuraisams123 »

yea man definately gotta try that.
-No animations whatsoever.
-Maximum dimensions of 500x120.
-Maximum filesize of 75kb.
User avatar
jks


Orb Scorched Earth

Posts: 3549
Joined: Sat Oct 02, 2004 2:29 pm
Location: SPARTAAAAAAAAAAAA
Contact:

Post by jks »

Thats in photoshop right? Why is it in the modeling section? But that looks awesome.
Image
HaloMod's Scapegoat�
Pie


Posts: 2690
Joined: Wed Mar 10, 2004 8:46 am
Location: Bedford \ Nashua, New Hampshire
Contact:

Post by Pie »

Well techniquely this is skinning and modeling, but i'll move it to tutorials.

And i have to say, this tutorial is amazing. At first i thought it was a generic tutorial, but the further i read and looked, the better it became. I first only though you were doing the rock with sphere applied (which woulda sucked)

But i have to say, i will recommend this to anyone who wants to make a planet. I'll try it out because my personal way is much different and time consuming lol. But you would have to be the judge of real-time looks.

Do you have AIM? Perhaps i can talk to you on there and discuss something of these lines.
Image
Thank You, SHOUTrvb, For This Fantastic Signature :mrgreen:
sn0wy@gmail


Posts: 1
Joined: Thu Apr 28, 2005 7:05 pm

Post by sn0wy@gmail »

ummm are you this same author?
http://www.pslover.com/click/951
Infern0


Designer Pyre

Posts: 1929
Joined: Tue Jul 13, 2004 10:57 am

Post by Infern0 »

sn0wy@gmail wrote:ummm are you this same author?
http://www.pslover.com/click/951
Lmao, owned :P
Image
{WoD}Deamon


Posts: 62
Joined: Tue Dec 21, 2004 2:52 pm

Post by {WoD}Deamon »

I dont think that he is the author of this totorial, he prob got it of the net, and did not give credit for it.....
Darkstorm995


Posts: 764
Joined: Tue Oct 21, 2003 8:28 am
Location: I DONT KNOW
Contact:

Post by Darkstorm995 »

if thats the case... Shame on you
Trance


Posts: 14
Joined: Sat May 14, 2005 4:08 pm

Post by Trance »

He probably just wanted to post this info here, but he could have put a "made by" at the beginning, or at least a link.
Duncan


Posts: 116
Joined: Mon Oct 04, 2004 10:49 am

Post by Duncan »

realistic 8)
User avatar
Excal


Socialist Pyre

Posts: 1779
Joined: Fri Jan 02, 2004 9:55 am
Location: Bronx, NY

Post by Excal »

He got it off of this site and didn't give credit to the original creator of the tutorial.

http://www.idigitalemotion.com
Image
Post Reply