Take Linux For a Test Drive
Posted: Thu Oct 02, 2008 1:44 pm
Total Installation Time: Less Than Two Hours
If you want to uninstall Ubuntu, if it was installed as outlined here, all you have to is follow steps 1-3 again. The installer only lets you have one instance of Ubuntu 'inside' Windows like this, and will ask if you want to keep the existing installation, or delete it and start anew.
=============================================
Ok, installing linux is exponentially easier to install than it was three years ago, and it at least five times easier than windows. Observe:
Step 1
Download the .iso file here: http://www.ubuntu.com/getubuntu/download
Step 2
Either burn the iso file to a CD with Magic ISO http://www.magiciso.com/ or load the .iso as a virtual CD with Daemon Tools http://www.daemon-tools.cc/dtcc/downloa ... ewCategory
Step 3
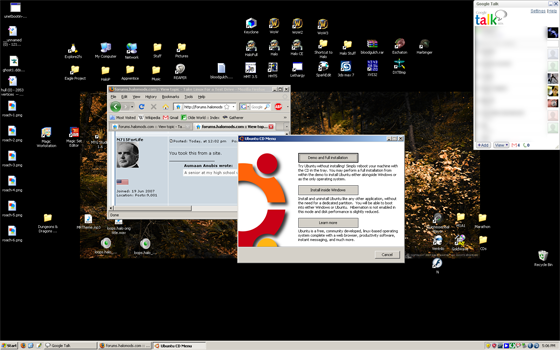
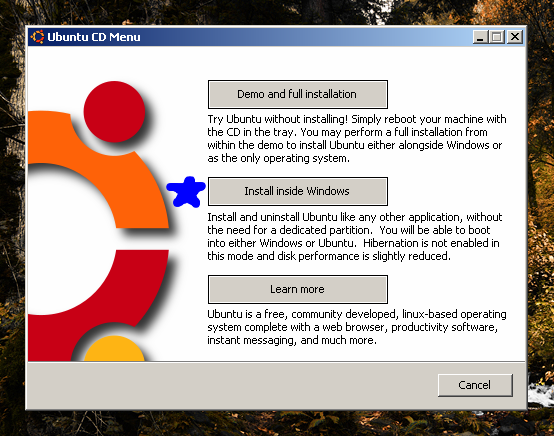
Put the CD in your drive while Windows is running (or mount it with Daemon Tools). A screen will automatically pop up. Answer some simple questions; and the install takes less than five minutes (I timed it).
You want to 'Install Inside Windows'. This option makes a large file in windows' file system (I set mine to 15 GB) that Ubuntu recognizes as a hard drive. If you put the CD back in after installation is complete, you can uninstall with no side-effects.
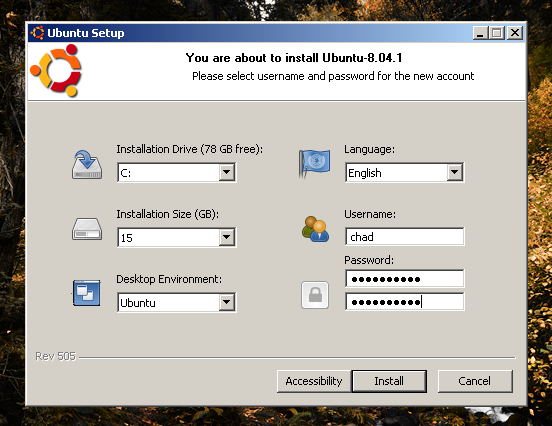
Choose the amount of space you want Ubuntu to have, and set your username and password (more users can be added once it is installed).
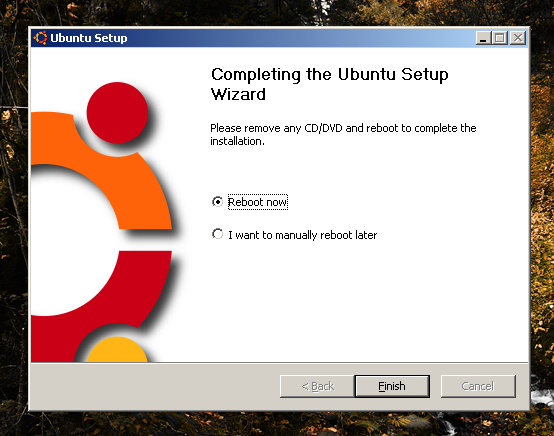
Done after less than five minutes! Restart your PC to see a choice between Windows and Ubuntu. If you select nothing, Windows automatically boots up after 5 seconds.
Step 4
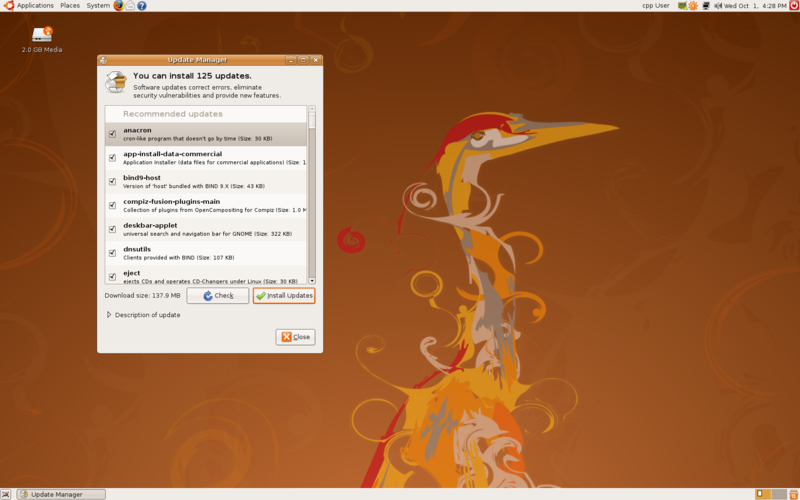
Ok, after you select Ubuntu the first time, the installation is finalized (again, less than 5 minutes) and the computer will restart again. Select Ubuntu to view your brand new desktop! Click the icon in the upper right corner that looks like an orange blot with an arrow to update your system.
Step 5
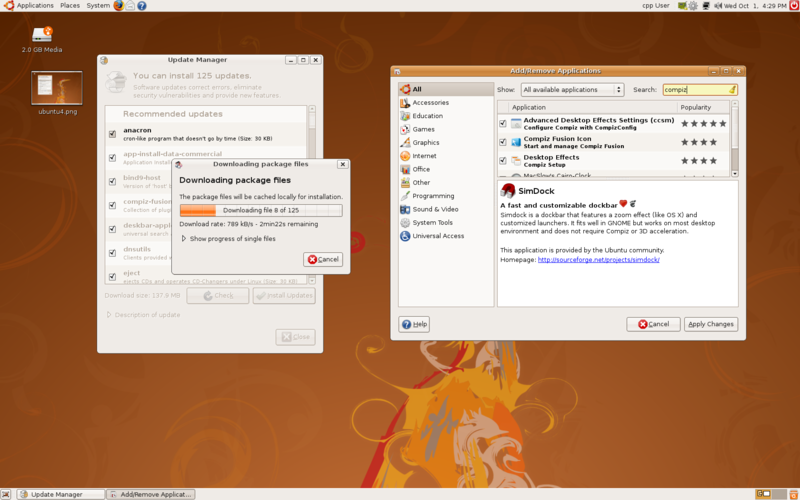
While we're waiting for the updates to finish, click Applications > Add/Remove in the upper left corner. Than select "all available applications" up top. This lists all programs available through the Ubuntu repositories. Just check a program to install it or uncheck a program to remove it. You'll want the packages "Advanced Desktop Effects Settings", "Compiz Fusion Icon", "Desktop Effects", and "Ubuntu Restricted Extras" to start. This will install Compiz, Java, and Flash Player. Both the updater and the program installer use synaptic, however, so wait for the updates to finish before clicking "apply".
Step 6
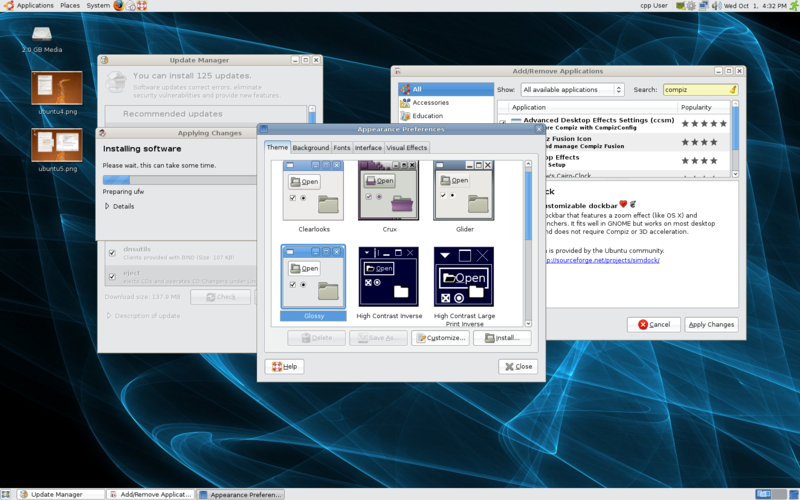
While you're waiting for all these packages to install, head over to http://gnome-look.org/ and get a cool wallpaper. You can also adjust the system theme in System > Preferences > Appearance
Step 7
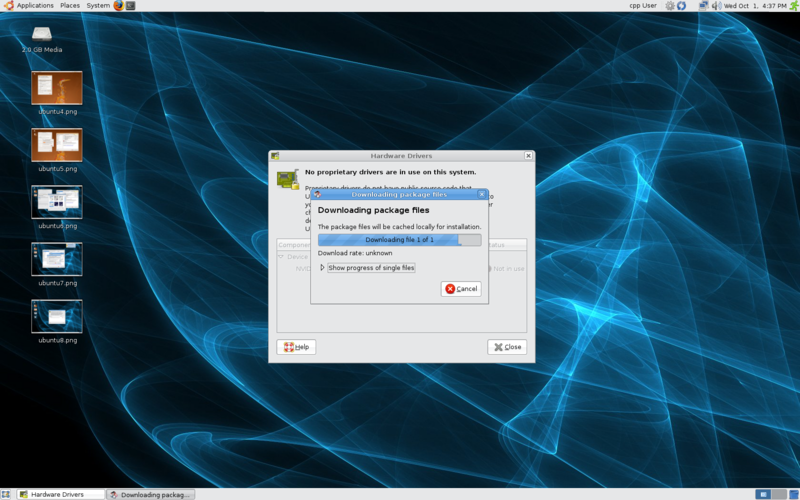
While you're in Appearances (after synaptic has finished), go to the last tab and select extra desktop effects. It should tell you that you don't have the required drivers for 3d acceleration, then ask if you want to install them. Sit back and relax as Ubuntu automatically locates the correct video driver and installs it.
Step 8
Reboot to finalize system changes. To enable Compiz, run Applications > System Tools > Compiz Fusion Icon. To make Compiz automatically run on startup, go to System > Preferences > Sessions and click new. Name it Compiz and put "fusion-icon" (no quotes) into the 'command' field.
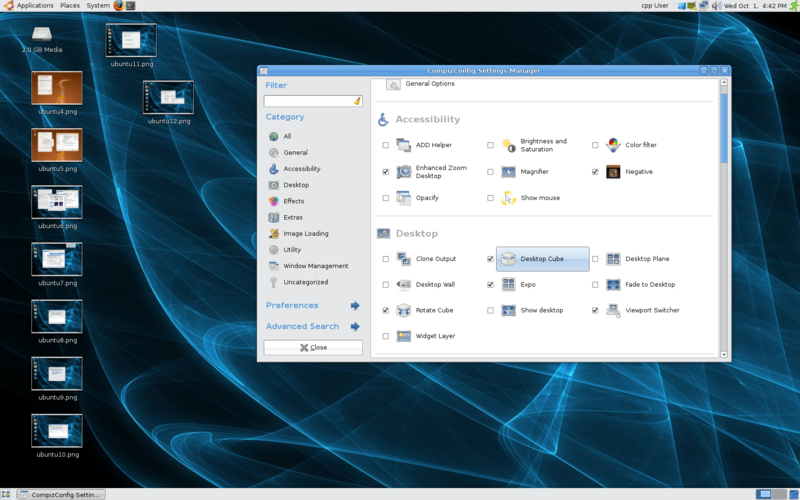
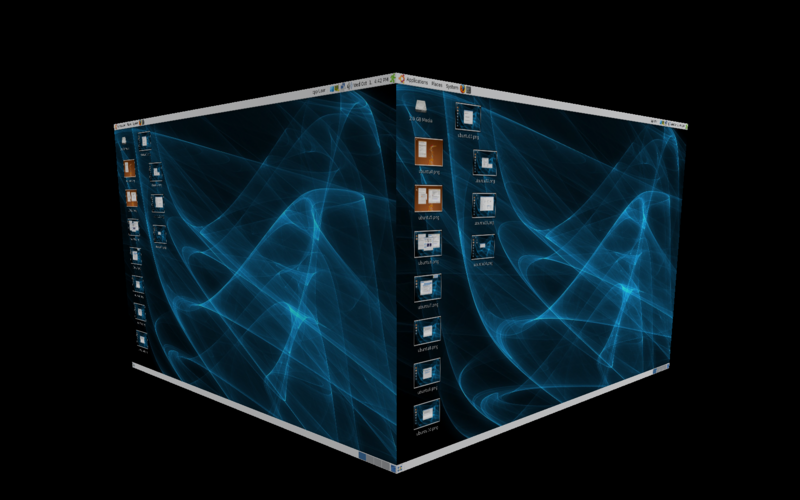
To change Compiz's settings, right click the blue box in the upper right corner and select the settings manager. Enable Desktop Cube, Rotate Cube, Cube Caps, and Wobbly Windows to start with (Answer yes if it asks to disable another plugin). Water effects are cool, as are drawing with fire. Check the ones you want, uncheck them later if you like.
Enjoy!
Ways installation has improved in two and a half years
-No tricky dual-booting; the Wubi installer takes care of everything.
-The metacity drivers (default video drivers) have improved drastically. You used to have to spend at least an hour adjusting your xorg.conf file if you had a screen resolution above 1024x768.
-Click, reboot; Compiz done. Seriously, that took me three weeks of configuration on my old ATI card (back when Beryl was still the way to go)
-Automatic video driver installation?
If you want to uninstall Ubuntu, if it was installed as outlined here, all you have to is follow steps 1-3 again. The installer only lets you have one instance of Ubuntu 'inside' Windows like this, and will ask if you want to keep the existing installation, or delete it and start anew.
=============================================
Ok, installing linux is exponentially easier to install than it was three years ago, and it at least five times easier than windows. Observe:
Step 1
Download the .iso file here: http://www.ubuntu.com/getubuntu/download
Step 2
Either burn the iso file to a CD with Magic ISO http://www.magiciso.com/ or load the .iso as a virtual CD with Daemon Tools http://www.daemon-tools.cc/dtcc/downloa ... ewCategory
Step 3
Put the CD in your drive while Windows is running (or mount it with Daemon Tools). A screen will automatically pop up. Answer some simple questions; and the install takes less than five minutes (I timed it).
You want to 'Install Inside Windows'. This option makes a large file in windows' file system (I set mine to 15 GB) that Ubuntu recognizes as a hard drive. If you put the CD back in after installation is complete, you can uninstall with no side-effects.
Choose the amount of space you want Ubuntu to have, and set your username and password (more users can be added once it is installed).
Done after less than five minutes! Restart your PC to see a choice between Windows and Ubuntu. If you select nothing, Windows automatically boots up after 5 seconds.
Step 4
Ok, after you select Ubuntu the first time, the installation is finalized (again, less than 5 minutes) and the computer will restart again. Select Ubuntu to view your brand new desktop! Click the icon in the upper right corner that looks like an orange blot with an arrow to update your system.
Step 5
While we're waiting for the updates to finish, click Applications > Add/Remove in the upper left corner. Than select "all available applications" up top. This lists all programs available through the Ubuntu repositories. Just check a program to install it or uncheck a program to remove it. You'll want the packages "Advanced Desktop Effects Settings", "Compiz Fusion Icon", "Desktop Effects", and "Ubuntu Restricted Extras" to start. This will install Compiz, Java, and Flash Player. Both the updater and the program installer use synaptic, however, so wait for the updates to finish before clicking "apply".
Step 6
While you're waiting for all these packages to install, head over to http://gnome-look.org/ and get a cool wallpaper. You can also adjust the system theme in System > Preferences > Appearance
Step 7
While you're in Appearances (after synaptic has finished), go to the last tab and select extra desktop effects. It should tell you that you don't have the required drivers for 3d acceleration, then ask if you want to install them. Sit back and relax as Ubuntu automatically locates the correct video driver and installs it.
Step 8
Reboot to finalize system changes. To enable Compiz, run Applications > System Tools > Compiz Fusion Icon. To make Compiz automatically run on startup, go to System > Preferences > Sessions and click new. Name it Compiz and put "fusion-icon" (no quotes) into the 'command' field.
To change Compiz's settings, right click the blue box in the upper right corner and select the settings manager. Enable Desktop Cube, Rotate Cube, Cube Caps, and Wobbly Windows to start with (Answer yes if it asks to disable another plugin). Water effects are cool, as are drawing with fire. Check the ones you want, uncheck them later if you like.
Enjoy!
Ways installation has improved in two and a half years
-No tricky dual-booting; the Wubi installer takes care of everything.
-The metacity drivers (default video drivers) have improved drastically. You used to have to spend at least an hour adjusting your xorg.conf file if you had a screen resolution above 1024x768.
-Click, reboot; Compiz done. Seriously, that took me three weeks of configuration on my old ATI card (back when Beryl was still the way to go)
-Automatic video driver installation?